Select the Venue containing the Configuration Template you would like to edit with the Organization Dropdown.
Go in the Login Portal page.
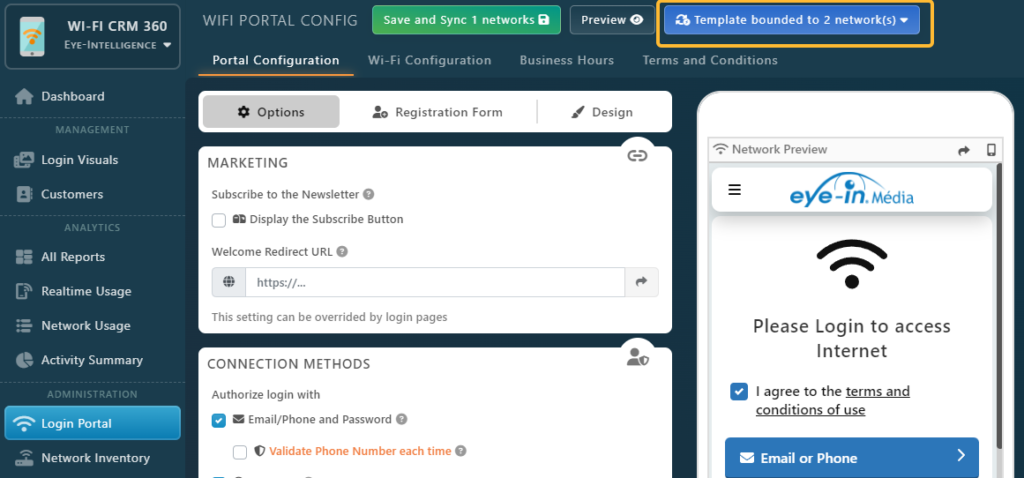
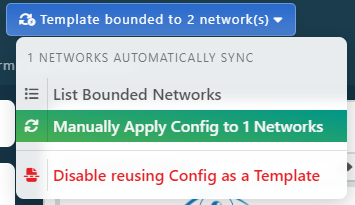
As you can see, the top Blue Button indicates how many networks are bounded to this Configuration Template.
You can edit all settings you want from there.
After you finish your modifications, you can click on the Save and Sync button.
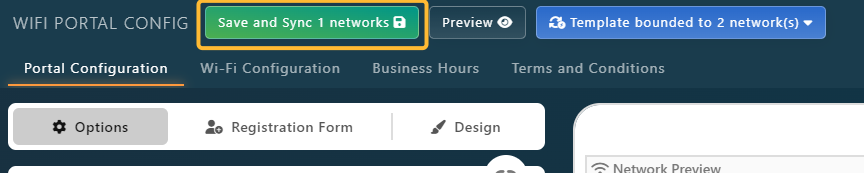
Note that the Save button indicates how many networks are configured to Synchronize Automatically.
To update network that are configured to Synchronized Manually see the next point.
Update Manually Synchronized Configurations
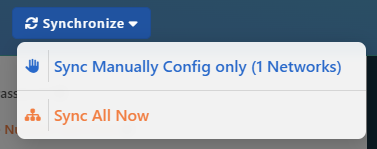
When you Save the Configuration template, it won’t affect a network that is not synchronizing automatically. To Apply the Configuration manually, click on the Blue Button Template bounded to (x) network(s) then select Manually Apply Config to (x) Networks.
If you wish to only apply the configuration to one specific network, you simply need to open the Network and Apply the Configuration Template manually as described in this article Network using a Config Template
List Bounded Networks
You can list all Bounded Networks by clicking on the Blue Button Template bounded to (x) network(s) then select List Bounded Networks.
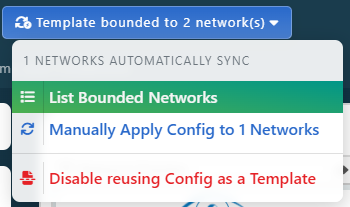
This will display the list of all networks using this current Configuration Template. From here you can also view the Bound settings like the type of Template Synchronization (manual or auto) and if it’s synchronizing the Business Hours.

You can edit any Venue Settings by clicking on it’s name and then by following this article Network using a Config Template
You can also force the synchronization of the network Configuration with the Synchronize dropdown.