Brief Overview
In this section, we will cover how to:
- Access the settings
- Adjust Communication settings
- Adjust Hours settings
- Adjust Automatic Answer settings
- Adjust Style settings
- Adjust Integration settings
Access the settings
You can access the settings is by clicking on Settings on the left-side menu:

If you are on the chat interface, you can also access the settings by clicking on the settings icon at the top of the interface:

Adjusting Communication settings
If you have the Communication tab selected, you can modify settings for the kiosk, notification, and sound effects.
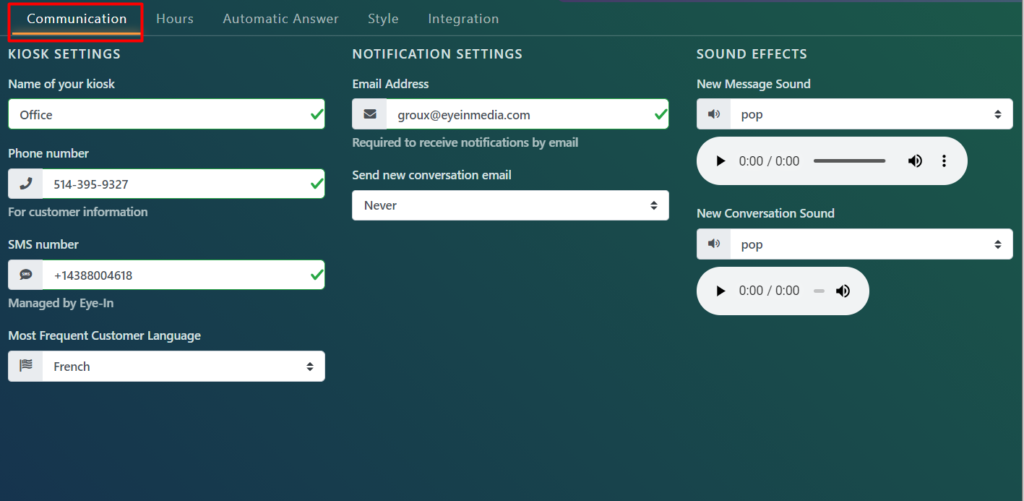
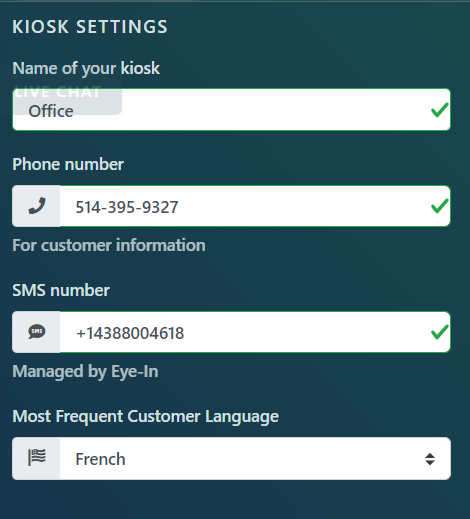
Kiosk
For kiosk settings, you can change the name of your kiosk, phone number, SMS number, and most frequent customer language:
Notification
For notification settings, you can change your email and set whether you want to receive new conversation emails.
The email is necessary in order to receive notification by email.
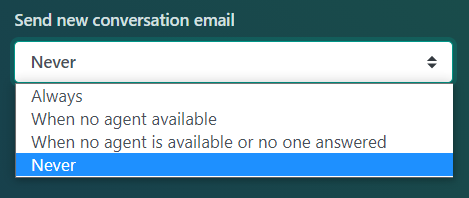
Using the drop-down menu for « Send new conversation email », you can choose the following options:
Sound effects
For sound effects settings, you can adjust the sound effect produced when you receive a new message and when a client starts a new conversation:
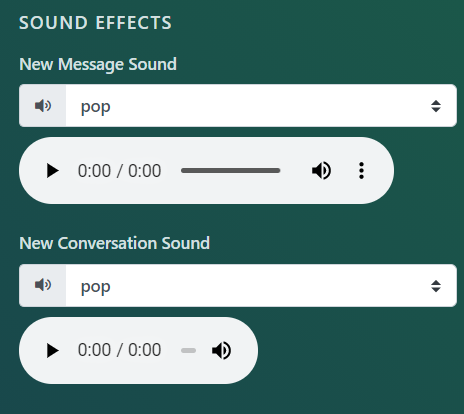
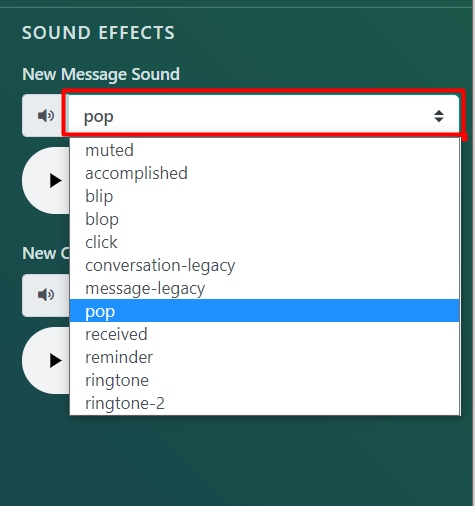
Click on the drop-down menus next to the sound name to view all sound effect options:
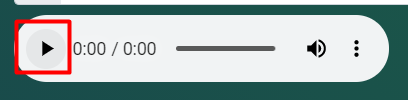
You can preview the sound effect by clicking on the play button under it
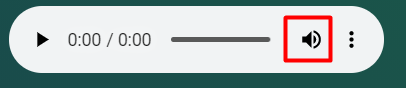
You can also adjust the volume by clicking on the volume icon, then dragging the slider:

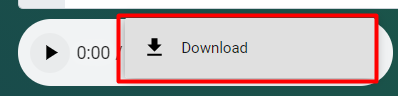
You can also download the sound effect by clicking on the three dots, then clicking « Download »:

**Remember to click Save when you are done with all the modifications:

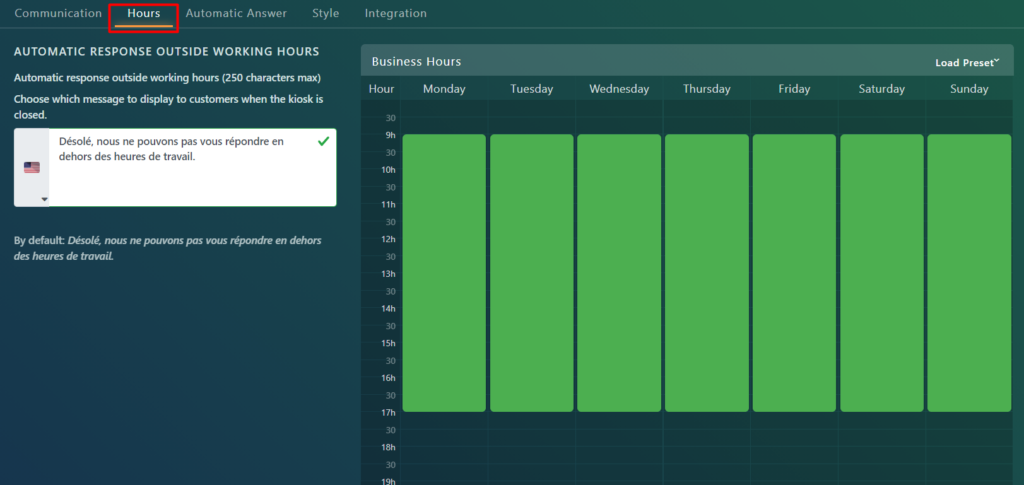
Adjusting Hours settings
Select the Hours tab in Chat settings. You can modify the automatic response outside your working hours and set your business hours:
To modify the automatic response outside work hours, first click on the message box:

Then type in a response in French and in English. When finished with your message, click on the area outside of the message boxes.
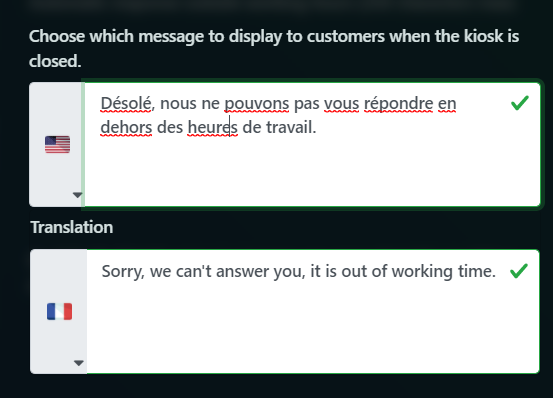
Note: there is both an English and French automatic response. To see the responses in either language, click on the flag icon:

Next, adjust your business hours by dragging over the boxes that correspond to those hours until you have all the appropriate time slots selected.
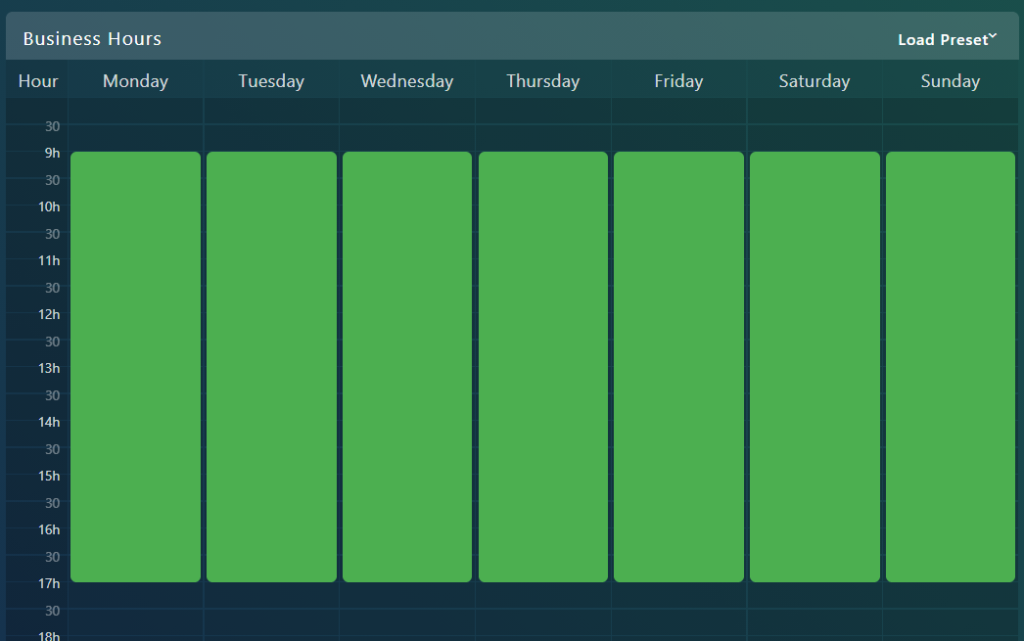
If you want to deselect a box that has been selected, drag over it.
**Remember to click Save when you are done with all the modifications:
Adjusting Automatic Answer settings
Select the Automatic Answer tab in the Chat settings:
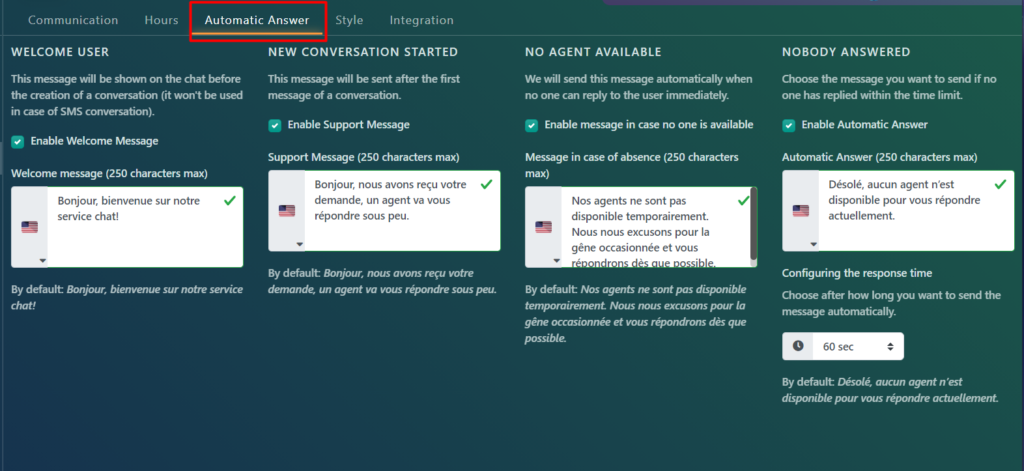
You can change automatic answers for these scenarios:
- To welcome users
- At the start of a new conversation
- When no agent is available
- When nobody answered
Note: For all messages, there is a 250 character limit.
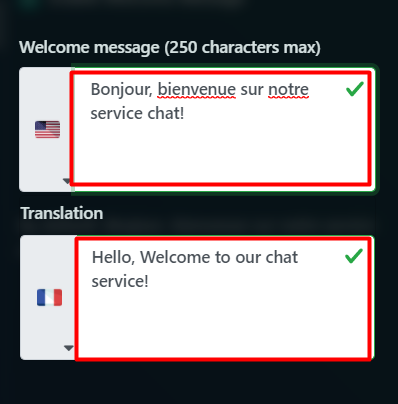
In each scenario, you can enable or disable the automatic response using by checking/unchecking the box next to the « Enable » option.
For example, the automatic response for the Welcome Message is enabled in this case:
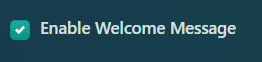
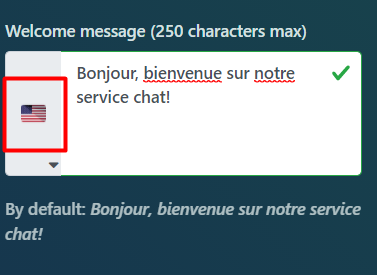
In each scenario, you can modify the message by first clicking on the message box:

Then typing in a new response in both languages:
When done typing, click anywhere in the dark area outside of the message boxes.
To view messages in either language, toggle languages by clicking on the flag icon:
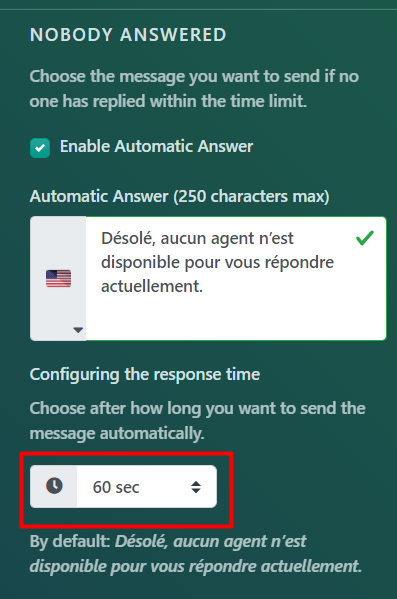
Finally, for the « Nobody answered » scenario, you can configure a response time, which is how long it takes before sending the message. You can adjust this time under the « Nobody answered » secion, by clicking on the drop-down menu for the time:

**Remember to click Save when you are done with all the modifications:
Adjusting the style settings
Select the Style tab in the Chat settings to modify the appearance of your chat:
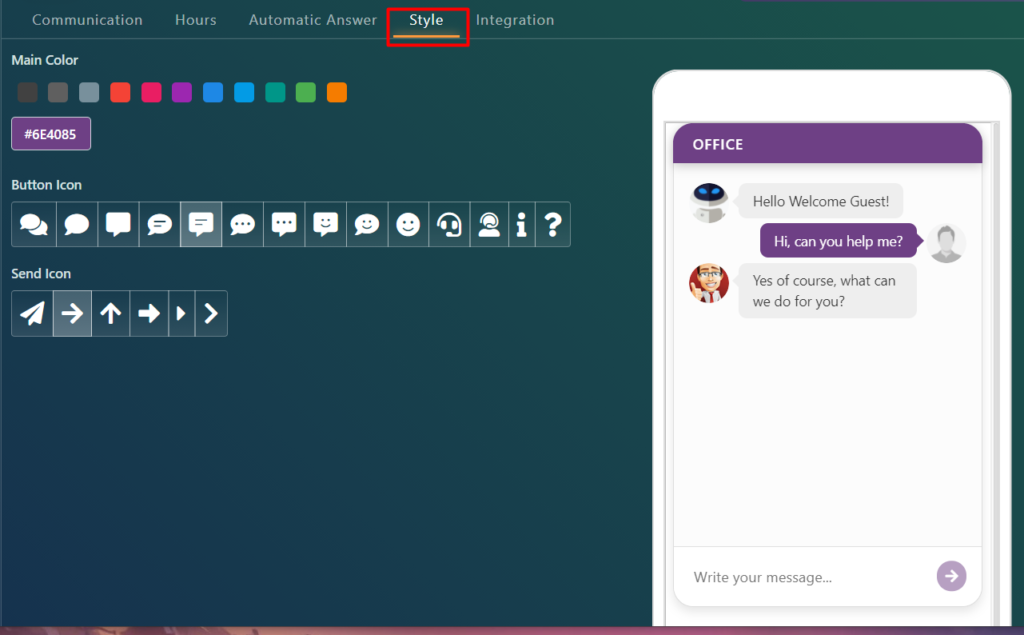
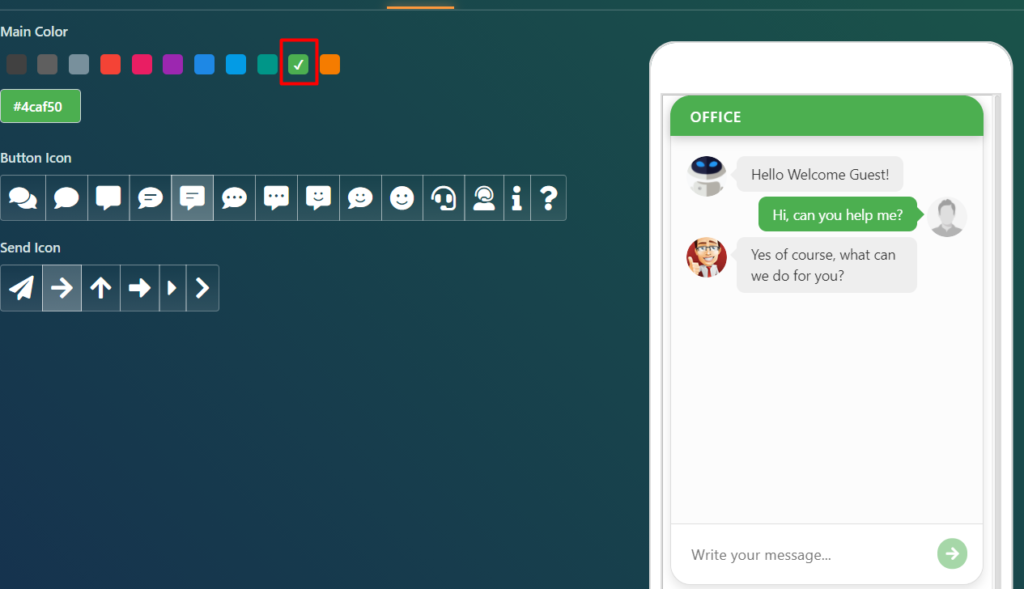
You can switch the Main Color of the chat. In this example, the color was set to green:
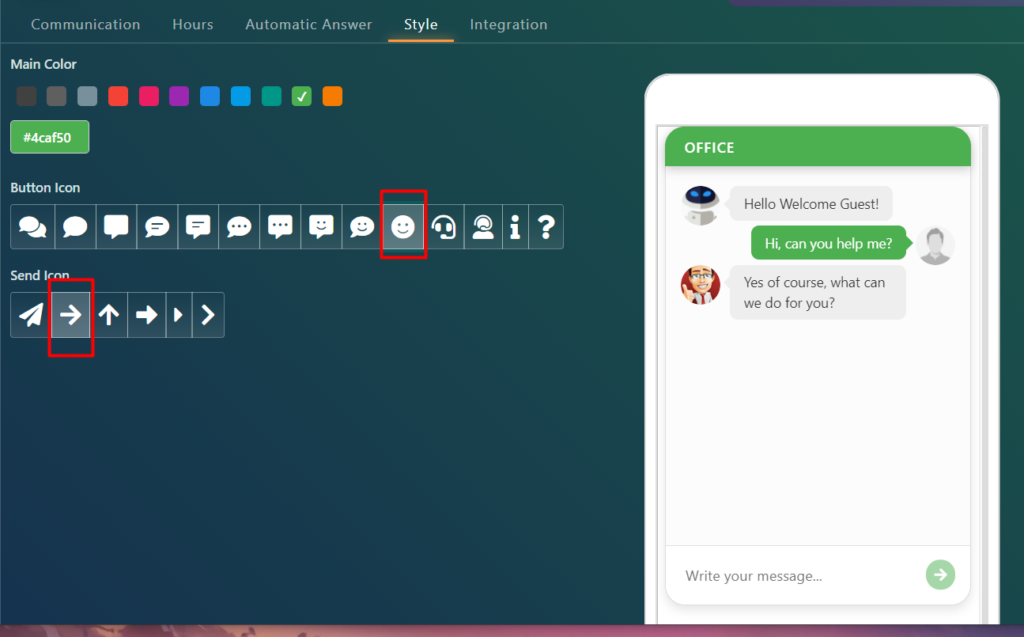
You can switch the Button Icon and Send Icon as well, for instance:
**Remember to click Save when you are done with all the modifications:
Adjusting Integration settings
Select the Integration tab in the Chat settings:
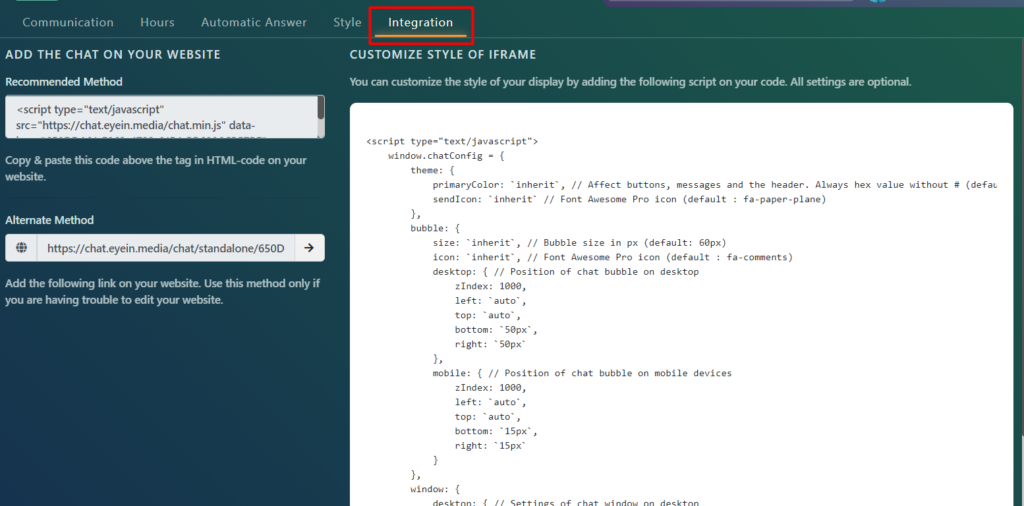
You can add the Chat feature to your website by copy-pasting this HTML code:

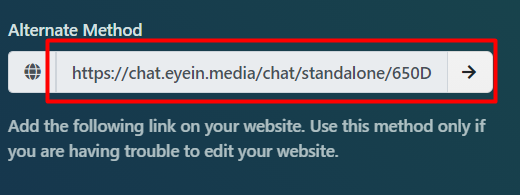
Another method is to add the link under « Alternate Method » to your website:
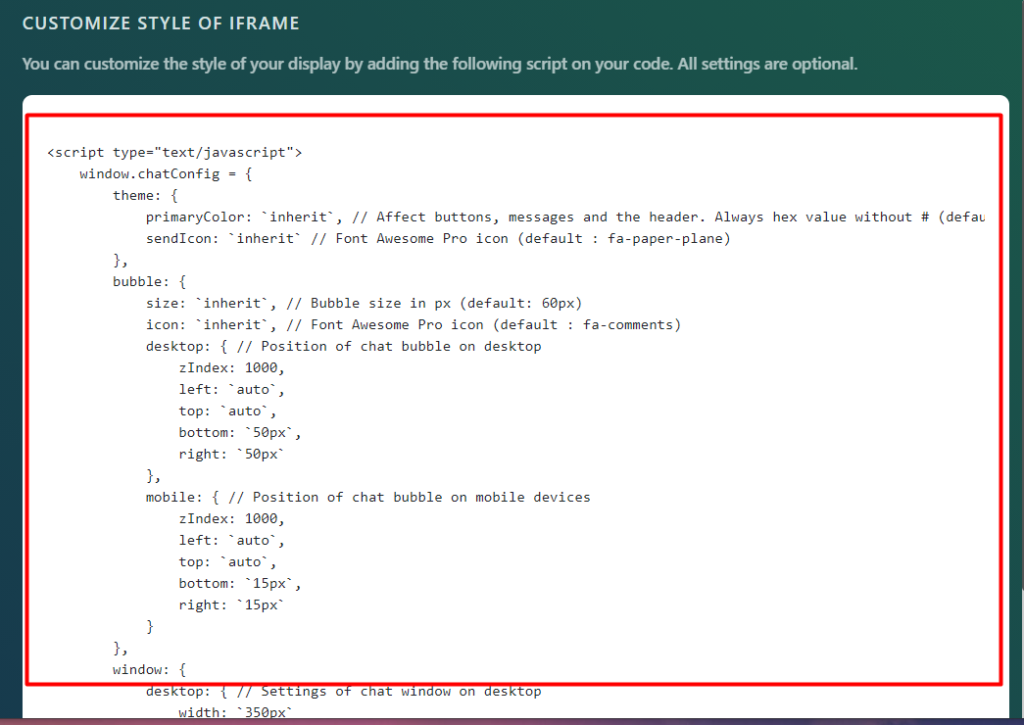
Finally, you can customize the style of your display by adding the script to your code: